

A Friendly Nudge
...because we all could use a little encouragement!

We all need to play more.
The Oxford Dictionary defines play as: “to engage in activity for enjoyment and recreation rather than a serious or practical purpose.
I especially like the first part of that definition, “to engage in activity for enjoyment”.
Play helped us develop so many valuable skills when we were younger, but we didn’t realize it at the time because we were too busy having fun.
Play lets us sneak up on skill acquisition. It’s why I think it’s so important that we find things that we enjoy doing that get us moving and learning new skills.
We’re never too old to play, we just have to keep our eyes open so an opportunity to cultivate our sense of adventure doesn’t pass us by.
I understand that cooking isn’t necessarily everyone’s idea of “enjoyment” but just speaking for myself, eating something delicious is something that I find enjoyable.
Bringing a sense of curiosity to cooking has helped me become a better cook, but it’s also turned something that used to be a chore into something that I enjoy.
I think you’ll find this week’s Mug Cake enjoyable to eat and it gives you a starting point that you can experiment with over time. I tried a lot of different versions until I found the foundation for this one at Gemma’s Bigger Bolder Baking.
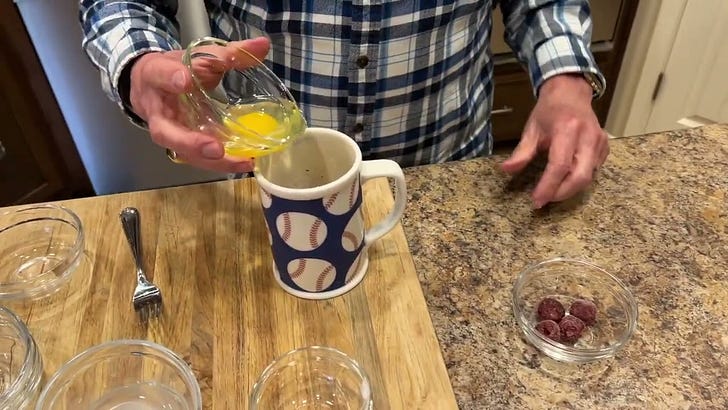
So let’s dive into this delicious chocolate & cherry mug cake…
Ingredients:
2 tbsp cane sugar
2 ½ tbsp flour (I used gluten free)
1 tbsp unsweetened cocoa powder
¼ tsp baking powder
Pinch of salt
1 tsp oil (I used coconut oil but avocado oil would also work)
Handful of chocolate chips or chocolate disks
2 tsp milk
1 Egg
4 frozen cherries (optional)
Place all of the ingredients except the cherries in a microwave safe mug and stir to combine completely. Then add the cherries and microwave for 45 seconds- 1 minute.
The beauty of this recipe is that it’s a single serving. You’re not staring down the barrel of an entire chocolate cake.
Now let’s make some deposits into your strength, balance, mobility and resiliency accounts with some doable exercises…
Foam Rolling Duration: As much time as needed
This is a great way to get your muscles ready for exercise. When you find a sore or tight spot, hang out for 20-40 seconds. Check with your doc if you have osteoporosis, osteopenia or other health issues. Avoid your armpits, lower spine, neck, front or back of knee.
Easy Skater Duration: 30 seconds to 1 minute
For this exercise, take a wide step and balance on one foot. This one combines a gentle warm up with a balance drill. If you need something to help with balance you could do this behind two chairs and use their backs for support if needed.
Slam Ball: Duration 5 “slams”
We’re working on our power production and we’re letting off a little steam.
The reason that we’re doing so few reps is because we want them to be explosive. I want you to throw the slam ball down like you mean it.
This is another time where you will double brace your core. Hopefully it’s becoming a little automatic by now.
Single Leg Balance on Yoga Block Duration: Start where you are and work up to 1 minute.
I’m always looking for new ways to improve my balance and a yoga block is a great way to increase the difficulty a little without getting too carried away. I just play around with different movements that force me to adjust.
Overhead Carry Duration: 30 seconds with each arm but take breaks if you need them
I struggle with this exercise because of the arthritis in my left shoulder but it’s one that I just grind out because it’s a functionality that’s important for me to preserve.
Start with a light weight and work your way up over time.
2 Minute Wall Sit Duration: Start where you are and be patient with yourself.
I posted this one in response to the Washington Post article and the British Journal of Sports Medicine study about isometrics.
Two minutes can feel like an eternity, 10 seconds is a great place to start and if you’re just getting started keep your butt a little higher up the wall and it will make standing up easier when you’re finished.
You want your abs engaged, your back and butt against the wall and your legs about shoulder width apart. And don’t forget to breathe.
This will give your quads, calves, glutes and core something to thank you for.
Seated Rows with Band Duration: 8-12 reps
I love being able to use resistance bands or Therabands to do this great gym exercise at home.
Braced core and proud chest are important here. Feel your shoulder blades go forward (protraction) when your arms go forward and feel your shoulder blades retract when you pull back against the band.
Standing Chest Press with Band Duration: 8-12 reps
You can use resistance bands that have handles or just wrap a resistance band around your shoulders and put your thumbs through the loops.
Proud chest, engaged core, shoulders retracted throughout the movement.
Use a band that will let you do 8-12 reps.
Walking Lunges: Duration Build up to 1 minute
These are basically sequential split lunges. You take a step, keep your body upright and then lower yourself where your trail knee almost touches the ground and your leading leg is parallel to the ground. Repeat the process by stepping forward with the trail leg.
These help with balance and they also work quads, glutes, and hamstrings. Work up to a minute but take breaks as necessary.
Shinbox Get Up: Duration - As tolerated up to 1 minute
My knees got less cranky when my legs started getting stronger and my hips and ankles started moving better. When your hips and ankles don’t move like they’re supposed to, that puts additional strain on your knees.
Take your time and do not push into a range that causes pain or pinching.
If this one is too challenging for your knees or hips, I’ve also included a seated internal rotation drill that might be more approachable.
Seated Internal Rotation: Duration - As tolerated up to 1 minute, working up to 2 minutes.
This is a little easier exercise for increasing our internal hip rotation.
You just squeeze the volleyball, soccer ball or yoga block between your knees and then move your lower legs out while keeping the ball or block squeezed between your knees.
Pallof Press Duration: 8-10 each side
This exercise can be done with a door and a door anchor to secure your bands or post or fixed object to secure a resistance band or theraband.
The Pallof press is a valuable drill to help improve your core stabilization, specifically anti-rotation.
Shoulders retracted, proud chest and double brace your core (pull your belly button back toward your spine and tighten your abs like someone is going to punch you).
Stand perpendicular to the attachment point of the band and hold the band at chest level and press outward resisting the effort of the band to pull you to the side. If you want to increase the difficulty you can balance on the foot farthest away from the attachment point.
Lateral Step Ups Duration: 30 seconds up to 2 Minutes
Life is three dimensional so it makes sense to practice moving in more than one plane of motion. I’m using a 12” platform and as you get more comfortable you could graduate to the 18” platform. You want to make sure you’re using something that is stable and that you establish your balance on the platform before stepping down. It’s not a race, so take your time.
The exercises this week offer an excellent way to accelerate your journey to a stronger version of yourself. There’s also exercises to help you develop more explosive power, as well as improved balance and mobility. Play around with these and find the ones that resonate with you. You can do this sequentially or individually as snacks, but the important thing is get started on your path to feeling stronger and more resilient.
Be sure to be on the lookout for opportunities to move a little more.
Have a wonderful week,
Jim
And as a reminder, play with your food!
Do we stop playing because we got older? Or do we get older because we stopped playing?